Custom domain setup
Purple provides easy and convenient support for custom domains on your Web Experience website. This article guides you through the set-up of a custom domain for your Purple Web Experience. If you encounter any issues, please contact Purple support for assistance.
Preconditions
- An available sub-domain
- Unless your DNS provider supports ALIAS/ANAME records, you cannot use the root (Apex) domain but instead need to use a sub-domain.
- Example:
- example.org is the root domain
- www.example.org is a subdomain of example.org
- If you use a sub-domain, you will need to take care of forwarding the HTTP requests from the root domain to the sub-domain yourself. We do not provide this functionality.
- Access to the DNS server configuration of that domain
- A Purple App with configured Web Experience
- The domain must not use CloudFront
- If the domain is already set up with a CloudFront instance, it first must be removed from the other CloudFront to set up CloudFront with Purple
How to guide
1. Go to Purple Manager – 'Apps' – 'Overview'
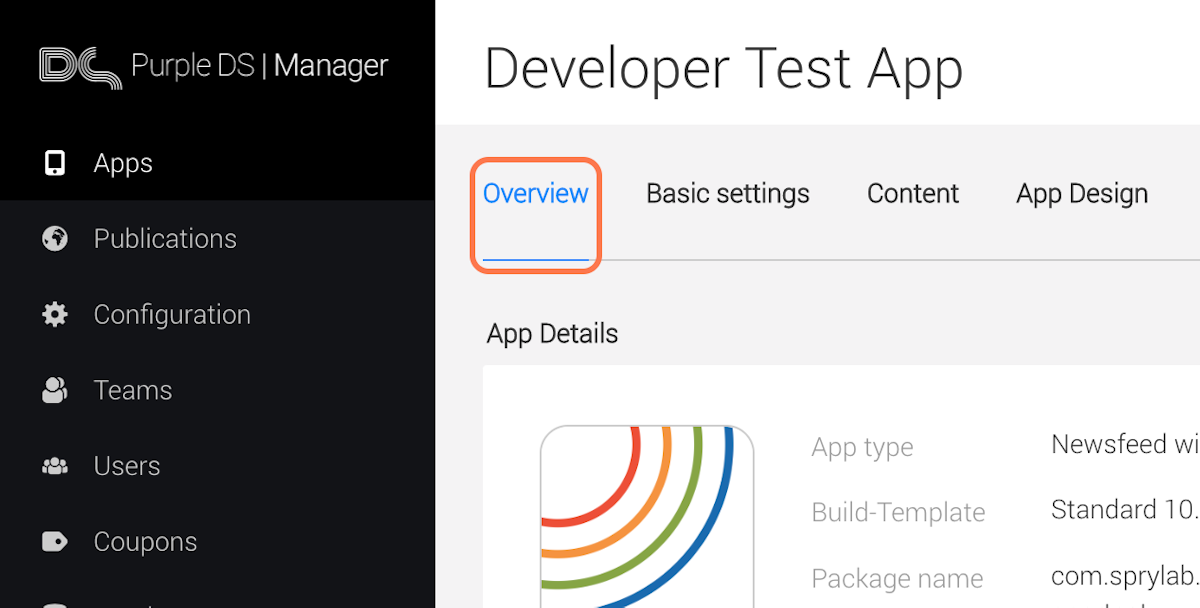
2. Click on the three dots menu

3. Click on 'Experience' in the dropdown
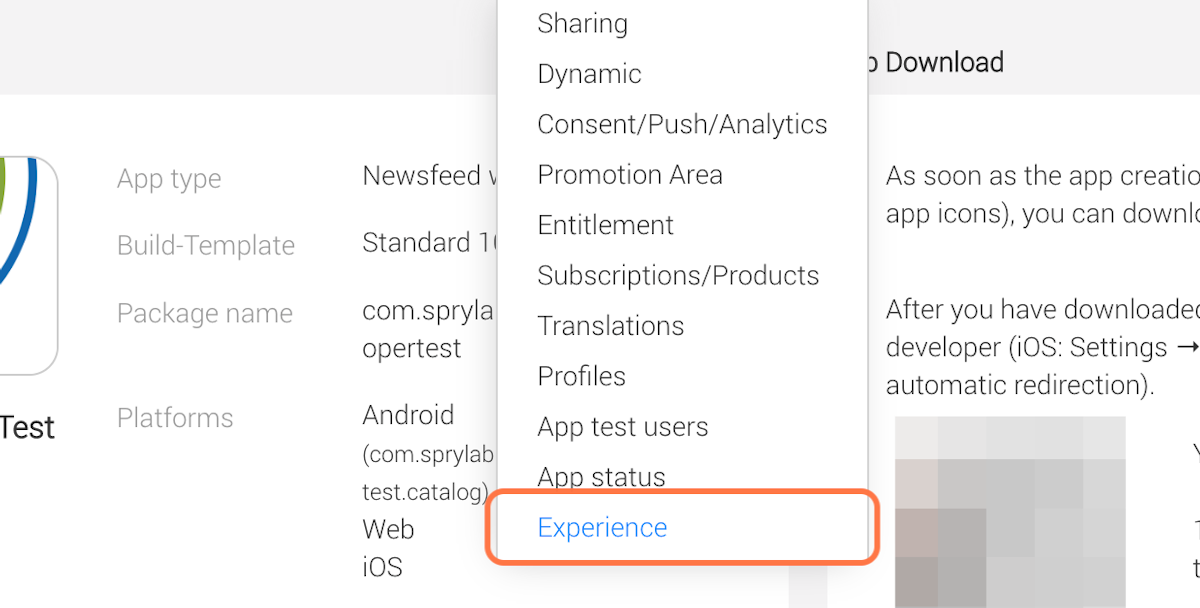
4. Next to 'Web Newsstand Domain' enter your desired domain name for the Web Experience. For example, epaper.example.com.
5. Click on 'Update'
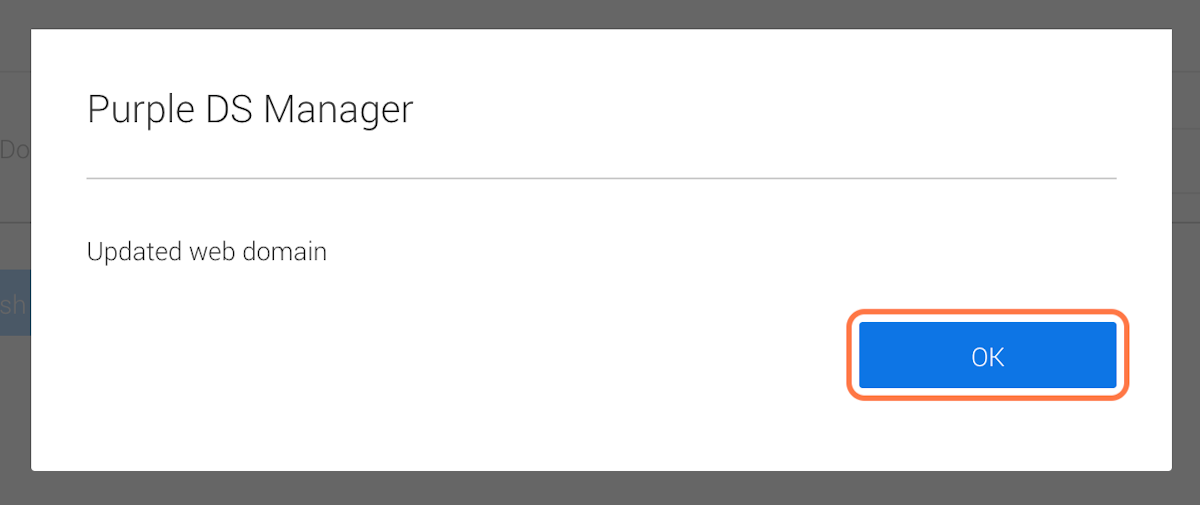
6. Click on 'OK'
7. Wait until the page shows DNS records for the Certificate.
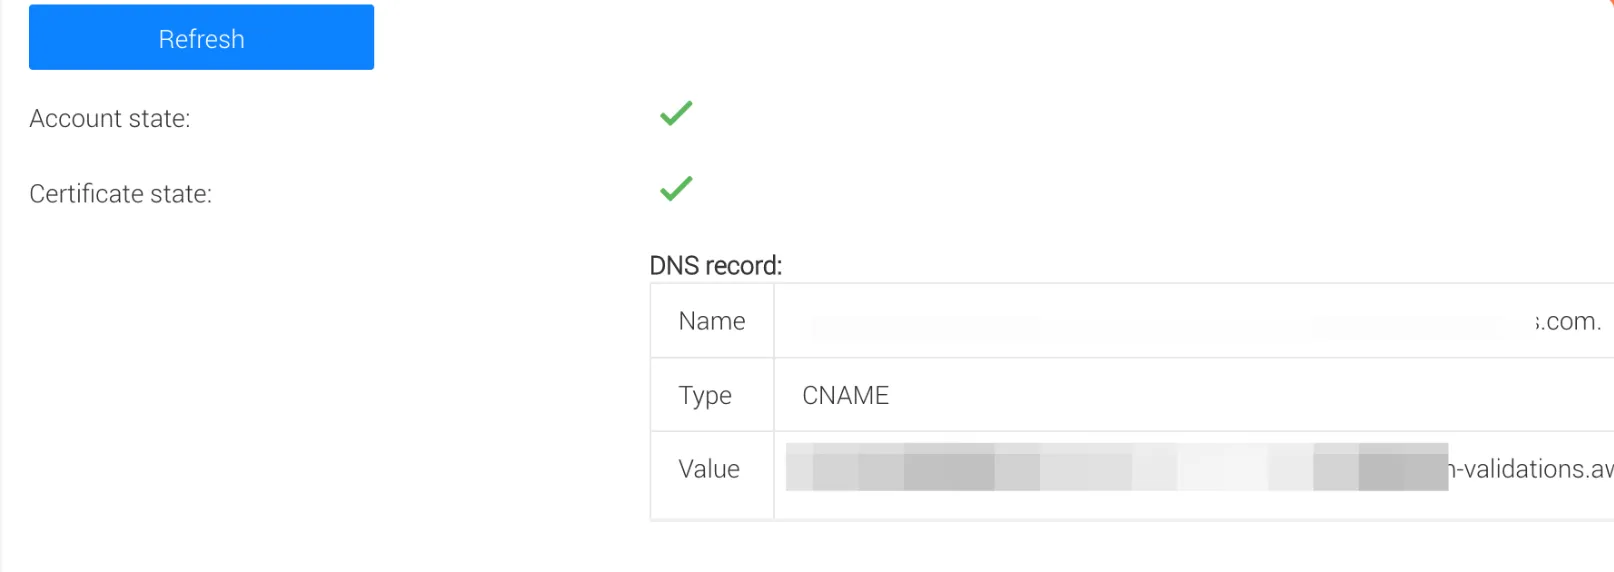
8. Configure the DNS records in your DNS server configuration. Create the CNAME record with the data shown in the UI. AWS needs this entry to be able to create a SSL certificate for the domain to use with the Cloudfront CDN.
Example
The screen shows the following data:
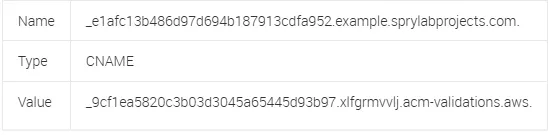
You then need to create a CNAME entry in your DNS tool, e.g. in AWS Route 53:
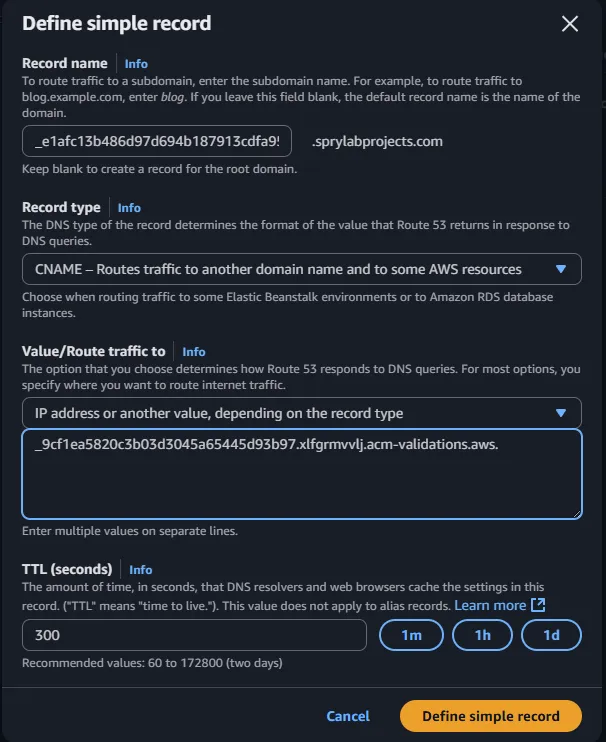
It may take a few minutes for AWS to check and create the certificate after you created the DNS entry.
Do not remove this record after successful configuration. It is needed for continued SSL support (renewal of certificates).
9. Wait until the page in Purple Manager shows the Domain Name for the CloudFront domain.
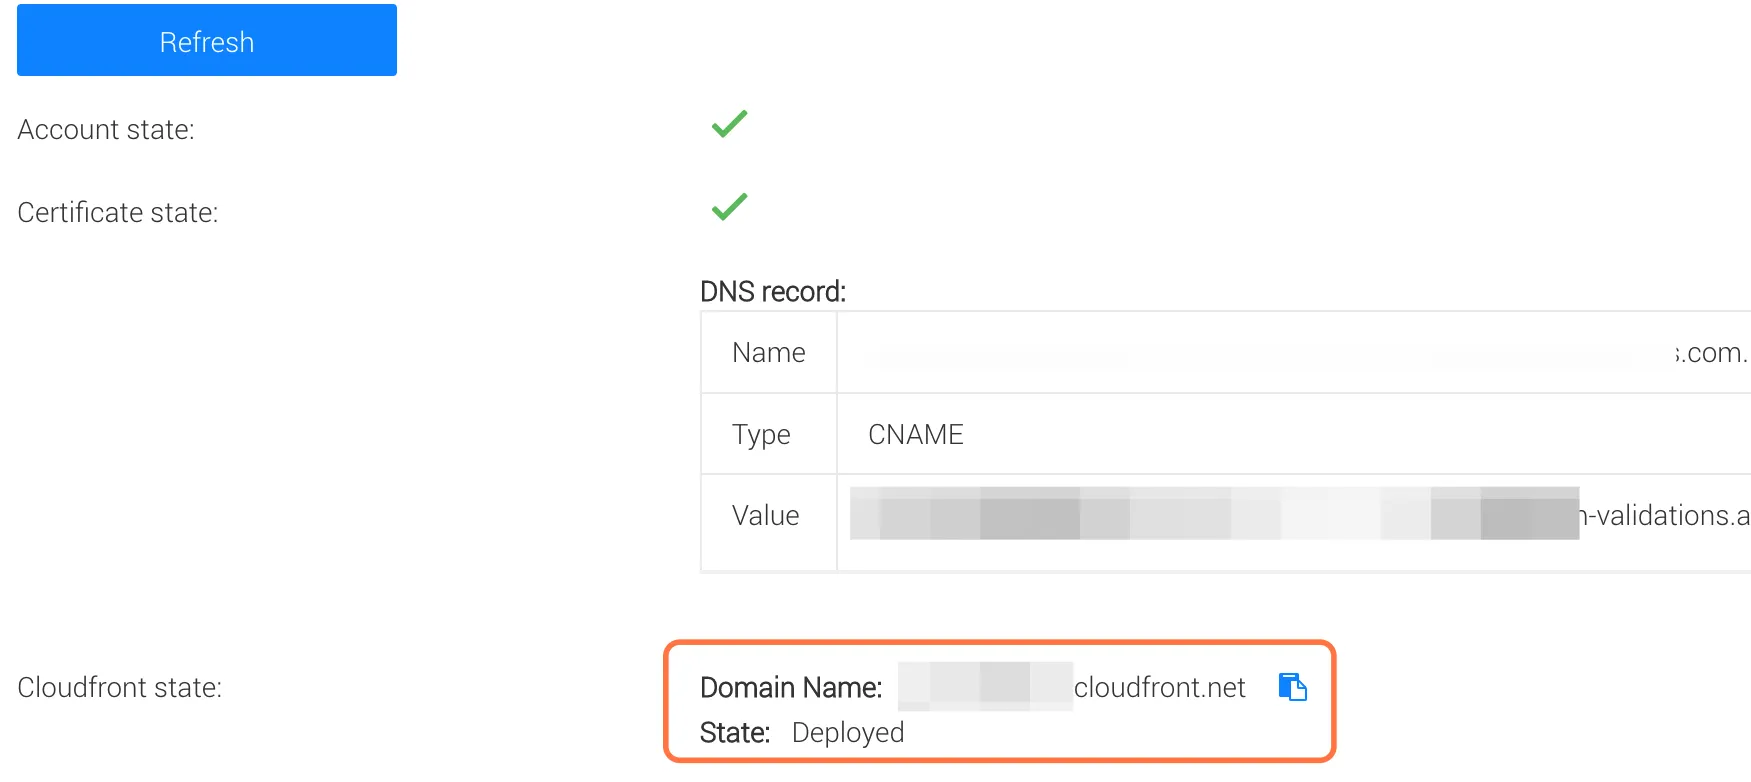
10. Configure the custom domain to point to the CloudFront domain using a CNAME in the DNS server configuration
Similar as done in Step 8, you will need to create a DNS entry for the domain like this:
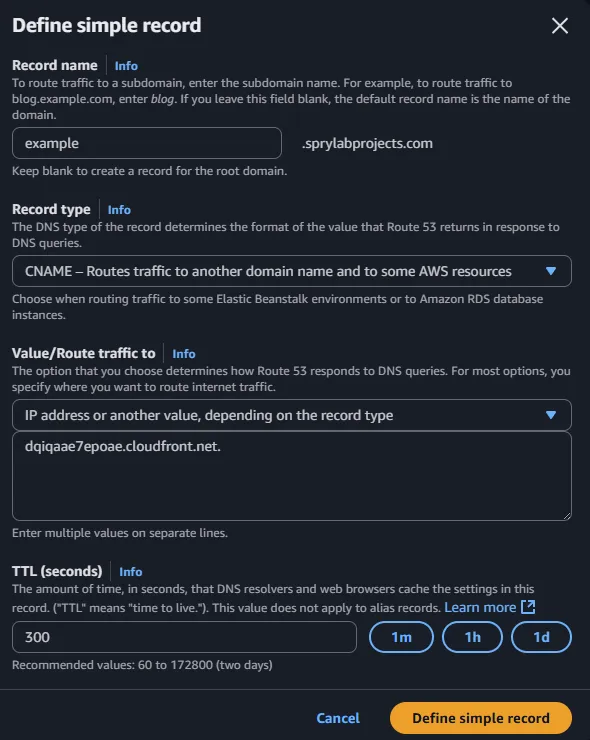
This step can be done at a later time, e.g. when the website should be made available.
To prepare for a switch-over, all previous steps should be done at least 24 hours before the planned switch. The existing DNS entries should also be switched to a lower TTL value in advance so that the cut-over time is as short as possible.
11. After a few minutes, the experience should be accessible via that domain name.
You have successfully configured the domain for your Web Experience, and the site is now publicly accessible.
Hub integration
Custom domains can be shown in the Hub editor sidebar, see Frontend Links in Purple Hub.
Troubleshooting
I created a DNS entry for the certificate / cloudfront domain but the setup process does not continue / the website is not available
Firstly, confirm that the DNS entry is created correctly. You can do this using the following command line tools, usually available on Windows, MacOS or Linux:
Windows
Open the command prompt (CMD) and enter the following: nslookup -q=cname <Value from Name row>
nslookup -q=cname _e1afc13b486d97d694b187913cdfa952.example.sprylabprojects.com.It should show either, in case of success,
C:\Users\MyUser>nslookup -q=cname _a87a7a5ba89b3e7b6271912bdd9d7414.example.sprylabprojects.com.
Server:  <your router>
Address:  10.0.0.1

Non-authoritative answer:
_a87a7a5ba89b3e7b6271912bdd9d7414.example.sprylabprojects.com  canonical name = _e1afc13b486d97d694b187913cdfa952.htgdxnmnnj.acm-validations.aws
or, in case of error,
C:\Users\MyUser>nslookup -q=cname _e1afc13b486d97d694b187913cdfa952.example.sprylabprojects.com.
Server:  <your router>
Address:  10.0.0.1

*** <your router> can't find _e1afc13b486d97d694b187913cdfa952.example.sprylabprojects.com.: Non-existent domain.
Linux / MacOS
Open a Terminal and enter the following command to check if the DNS entry exists, e.g.
$ host _e1afc13b486d97d694b187913cdfa952.example.sprylabprojects.com.It should either show in case of correct setup
$ host _a87a7a5ba89b3e7b6271912bdd9d7414.example.sprylabprojects.com.
_a87a7a5ba89b3e7b6271912bdd9d7414.example.sprylabprojects.com is an alias for _92c59670aad38d1f043be9d9f77119f4.htgdxnmnnj.acm-validations.aws.
or in case of an error
$ host _e1afc13b486d97d694b187913cdfa952.example.sprylabprojects.com.
Host _e1afc13b486d97d694b187913cdfa952.example.sprylabprojects.com. not found: 3(NXDOMAIN)
If there is an error shown, this means that the DNS entries are incorrect or not fully published yet. Depending on your provider it may take some time for changes to the DNS to become active. Please verify the created DNS records match exactly what was provided and shown here in the examples.